Wednesday, July 30, 2014

It's All Greek To Me!

So lately, life has become pretty busy.  I got a new calling as Relief Society President at my church. 
That takes a lot of time, not to mention my three kids and all their activities.  So blogging has been put on the back burner a little. But recently we had a really exciting experience!  Lance and I got to go to Greece!  It came up super suddenly.  So suddenly, that we only had 1 week before we left to get our passports renewed.  But everything worked out really well. 

The reason we went was because Lance got hired by the US State Department (for a temporary assignment, he still works for BART) to go to Athens to teach an anti-terrorism class. His travel and expenses were paid for.  He also got a nice salary for teaching and the salary paid for all of my expenses!  Your tax dollars hard at work!  :) 

Lance was there for two weeks and I was there for 10 days.  I flew from SFO to Amsterdam. Unfortunately I didn't have enough time to leave the airport in Amsterdam but flying over, it looked like a pretty cool city.

From Amsterdam I flew into Athens.  Lance and the driver the US Embassy hired for him picked me up at the airport and took us to our great hotel in Kifissia.  In Athens, we saw all the ancient sites.  We did a lot of shopping at the flea market and Plaka area.  We went to a traditional Turkish bathhouse that was amazing.  And we ate and ate and ate some more!  Those Greeks have good food! 

An ancient church in the middle of a modern shopping area

On top of the Acropolis

The nighttime view from Mars Hill of the Acropolis

Ocean front in Athens

The temple of Poseidon

The Acropolis

Our Hotel

The Plaka area

We also got a chance to fly to the amazing island of Santorini.  It is one of the most wonderful and beautiful places on earth (at least that I've seen).  I loved every second of it and wish we could have spent more time there.
Beach side lunch

Oia, Santorini

The famous Oia sunset

Beautiful Santorini

After sunset

Our hotel room, "The Pearl" suite
The view from our hotel room

Looking up at our hotel

More Oia

Honestly, I was ready to come home after 6 days.  I did get a lot of sleep and got to workout uninterrupted (unlike at home), but after all is said and done, my favorite place is at home with my girls!  But it was an opportunity of a lifetime and I have some great memories that will last forever! 

Monday, July 7, 2014

Kitchen Touch Up

So far in our house, I feel like most of the projects we've done have been about making the house work for us.  Very little just to pretty it up.  But our latest project was all about pretty.

I really love my kitchen, but the backsplash was NOTHING I would have ever chosen.  This is what it was:
...Some weird slate like thing.
So we decided to spend what we figured would be about $80-100 and a few days worth of work and make it our own.  $400 and 1 week later this is what we have now!
 Marble mosaics!

 It was not at all what I had in mind when I started looking for tile, but I really love it.  It's the perfect personal touch to my kitchen!


Thursday, May 29, 2014

My New Blog

If you haven't already seen it, I'm blogging about my journey to a healthy life.  Check it out at doubtingmylimits.blogspot.com

It's really just a way for me to stay accountable to myself and to the universe!  I'm writing about what I'm doing that's working (or not) and the progress I'm making.  It's helping me stay focused, but I'd love for you to share this experience with me.  Check it out and let me know what you think.  I can use all the help I can get!

Tuesday, May 20, 2014

Fun Little Garden Project

 I got the idea for these signs on one of my new favorite HGTV shows, "Fixer Upper".  Theirs were small and I wanted to make bigger versions for my garden.  I love how they turned out. 


Each sign cost less than $4 to make.  I just used pre-painted chalkboard rectangles from Michaels and paired them with unpainted wooden frames.  I bought a little bottle of metallic craft paint and used dowels and chalk I had at home.  I glued them all together with liquid nail and stuck them in the dirt!  It took about 20 minutes to do both.  I'm not sure how they will hold up in the winter, so I'll have to take them down when the rain starts. But I'm so happy them and with the character they add to my backyard! 

Tuesday, April 29, 2014

Dresser Re-do


Life is kinda crazy these days and I seem to be good at blogging in spurts, but I really want to try and be more consistent. We'll see... 

I have been doing things though.  I've actually been checking off a few things on my to do list of home projects.  Here's one I am really proud of.  I painted my littlest one's dresser. 


Here's the before....
Ugly golden colored pine... in style and what we wanted 9 years ago when we bought it, but did not go with anything I wanted to do in Riley's room now.

So here's the after....

The color is Sherwin-Williams Light French Gray.  I'll post pictures of her finished room, because it also got a total re-do and I really love how it turned out.  But for this post I thought I'd explain my steps for painting furniture.  I've done it so much, I have almost perfected it and I get a lot of questions from people about how I do it.  So if you need these instructions here they are.  If not, just admire how great it turned out! :)

The first step is priming.  I use a product from Sherwin-Williams called Adhesion Primer.  Unfortunately, they don't sell that specific thing anymore, but I have been told they do have something similar.  And any primer that is meant to adhere paint to normally unpaintable surfaces will work.  It's just such a huge time and effort saver because the primer coat goes on right over any previous paint and/or top coats.  I don't sand AT ALL. It sounds like it wouldn't work, but with the right primer it really does and the paint sticks like glue!

The primer goes on completely uneven so don't worry about how it looks at this point and it takes about two coats to really get the coverage you need before applying the paint. 

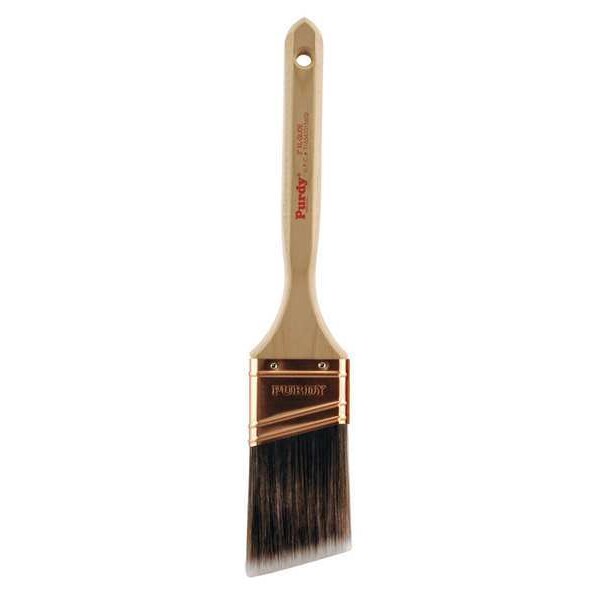
Now, to get the smooth "sprayed on" look I am able to get on my projects use my two hand/two brush technique.  It's not complicated.  I use 2 brushes: a 2-inch angled paint brush in one hand and a
4-inch foam roller in the other hand, alternating between the two the whole time. 
http://cloudfront.zoro.com/product/large/6YAH0_AS01.JPGhttp://cloudfront.zoro.com/product/large/29UT17_AS01.JPG
These two brushes used together leave NO roller or brush marks on your project.  The trick is to use the brush only in places the roller absolutely can't reach and then immediately smooth out everything possible with the roller.  Until the foam roller is completely saturated with paint (the same with primer) it will leave small bubbles, but I just keep rolling over them and they will go away quickly.    Once the entire piece has been primed, let it dry a couple of hours.  I think I let this dresser dry overnight. 
When the primer coat is dry, it's time to paint.  I always use Sherwin-Williams Pro-Classic paint.  It's made for trim and cabinetry and makes a big difference in the final appearance.  The technique is the same as with the primer though.  Just roll on the paint with the foam roller. Brush only the tiniest places, like corners and other places where the roller can't completely touch.  Then immediately roll out any brush marks, even squishing the foam roller into the corners as much as possible. 

The last step is to top coat it with a varnish.  I used a water-based high gloss varnish.  I put one coat on and it really seals the paint. 

That's it.  I use the two hand/two brush technique with all the layers and it creates a really smooth finish with no brush strokes.  Go ahead...see if you can find one!
I'm really happy with the finished product. It took about 4 hours of actual work, but I saved a ton of money being able to use a dresser that is a super sturdy piece of furniture with many years of life left in it.  It still makes me happy every time I see it!


Monday, April 21, 2014

How Did This Happen?

I turned 41!!!  I suppose it's better than the alternative, but it sure feels like it snuck up on me!

I'm usually a huge celebrator of my birthday, but this year it was a little more low key.  My parents came out to watch my kids so my husband and I could do Tough Mudder (please see previous post) and stayed through my birthday and Easter.  That was fun having them here.  We spent a lot of the week just going to the girls' swim, tennis and karate lessons, sampling all the good food we have in the area, and watching movies. 

On my actual birthday, I woke up to a house decorated with streamers and Minnie Mouse birthday decorations.  Lance and the girls had made me homemade chocolate waffles for breakfast. The rest of the day we spent in San Fransisco. I love being 25 minutes from downtown!  I wanted to go to the wharf to visit the Boudin Factory and have lunch there.  That was fantastic!  Even my dad who usually hates San Francisco enjoyed it! 

Then we went to the amazing Westfield Mall on Market Street to pass the time until our dinner reservation time at Roy's (what has now become my birthday dinner tradition seeing as it is the 4th year in a row I've eaten at a Roy's somewhere in the world on my birthday). 

Dinner was fabulous as usual.  Dessert was even more amazing and the company was unbeatable!  So happy to have the parents I do, a husband who treats me like a queen and three wonderfully sweet daughters who make my life so happy!  Here's to another amazing 41 (plus) years...and lots more birthday celebrations!

Saturday, April 12, 2014

A Member Of Mudder Nation!

What is Mudder Nation you ask?  It's only referred to as one of the toughest events on the planet! It makes 5k and 10k mud runs seem like a waste of a clean sports bra!  Here's some course facts for Norcal Mudder.  It's 2170 feet of vertical gain over 10.3 miles up and down the craziest mountains you will ever see including a 40 degree slope on the almost 1 mile climb known as the "Cliffhanger".  Then as if that wasn't enough, there were 25 killer obstacles along the way including things like "Arctic Enema", a 34 degree tank of water you had to jump into, then swim underneath a board in order to get out of.  And of course there was "Electroshock Therapy", a mud bog with electrified wires hanging down that you had to run through.  Oh and mud...so much mud! 
Nice and clean before we started!
We did this with 8 other couples on a team called, "Couples Therapy: Mud.Pain.Love".  It might not sound like it, but really it was a blast!
A selfie with Liz (you know you loved it!) :)

(Most of) The Couples Therapy gals ready to rock the course!
 I had so many cuts and bruises and even a real finger injury which has yet to fully heal!  But hey... that's what you do for that awesome orange headband!
So...do you bleed orange? You know you want to!